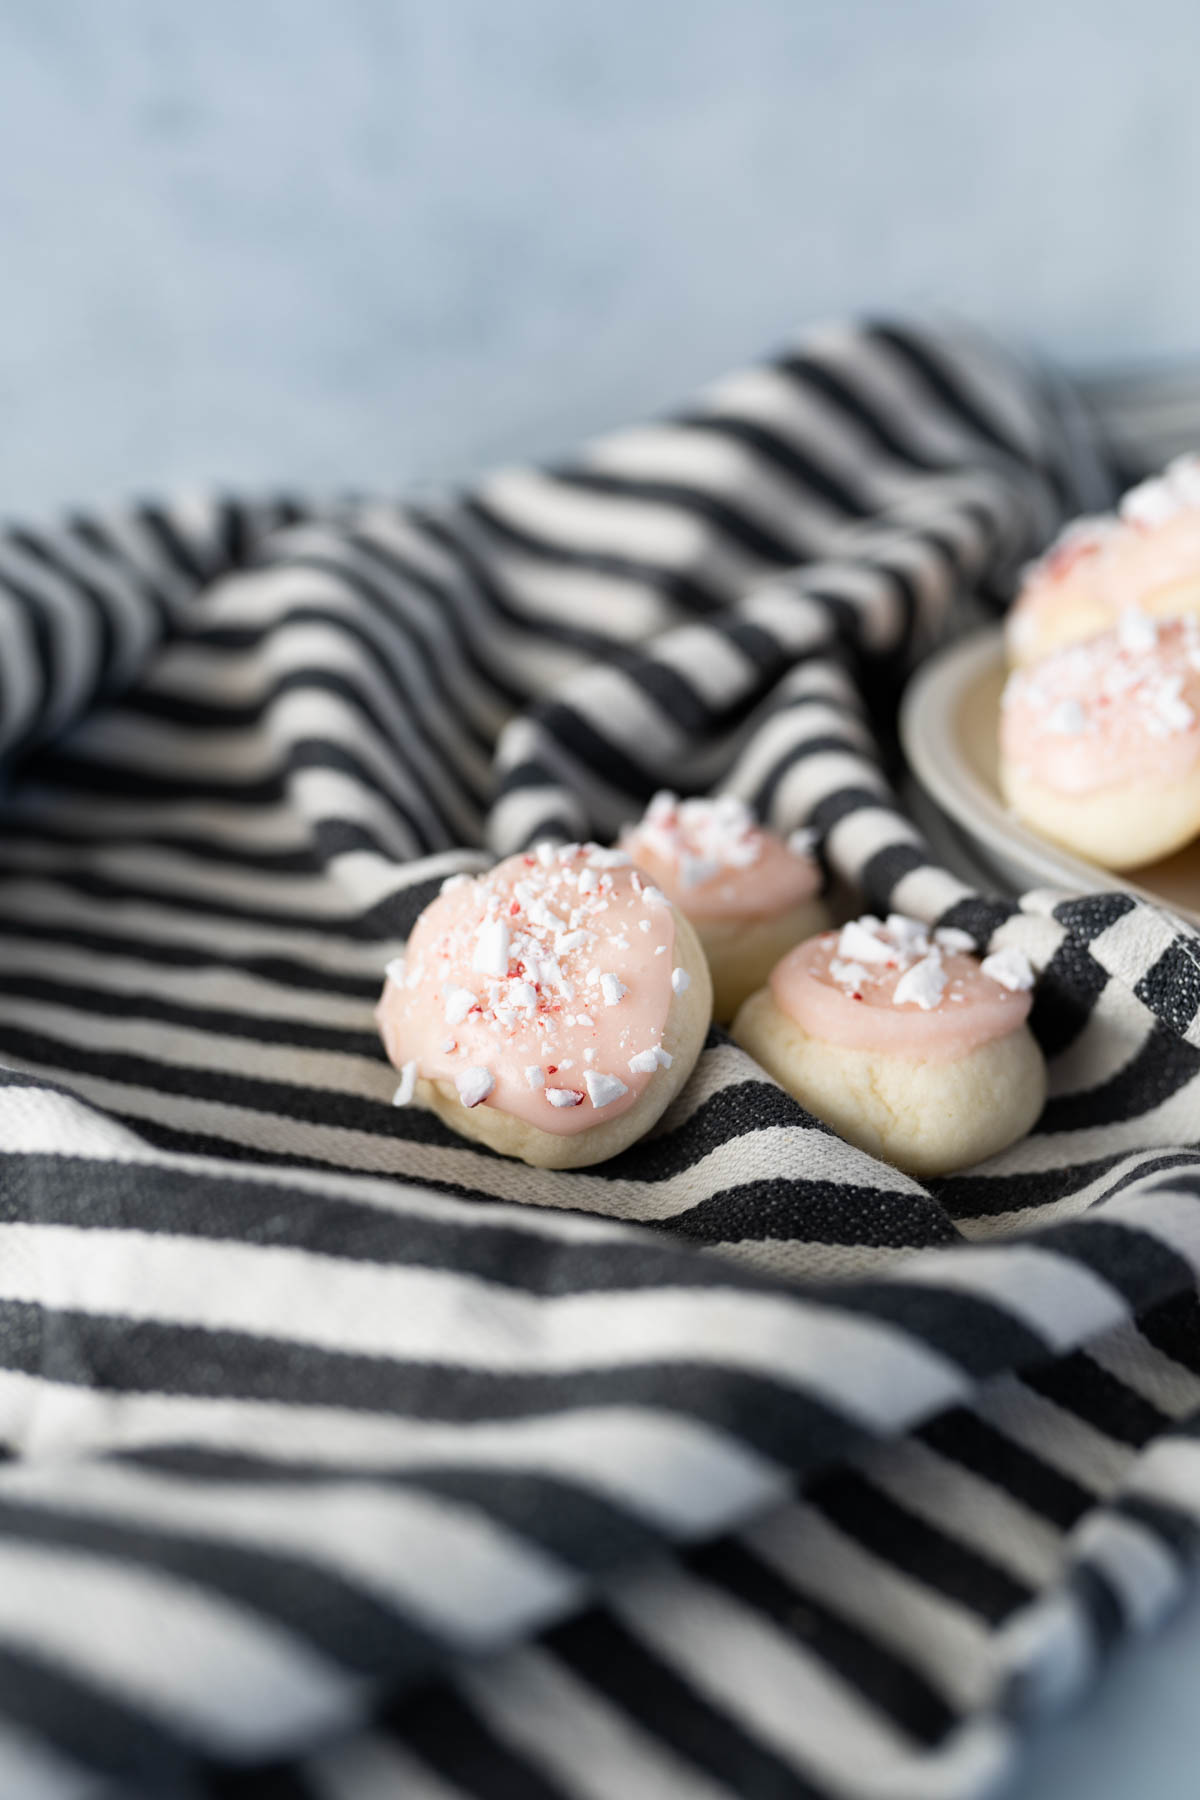
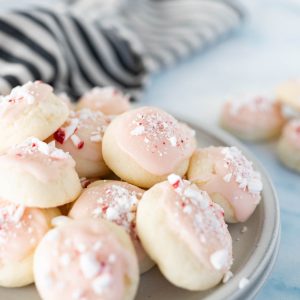
Peppermint Meltaways
Yes, peppermint meltaways may *technically* be a holiday treat, but when cookies are this delicate, buttery, and refreshingly cool they demand to be eaten year round.

Peppermint Meltaway Cookie Recipe
Hot take: a good meltaway cookie is one of the most underrated desserts of our time. Okay, that may be a little dramatic but I am genuinely obsessed with how this peppermint cookie quite literally melts in your mouth! A buttery-smooth, melty cookie that dissolves in your mouth and is chock full of sweet peppermint flavor? I mean come on! It’s no wonder that I’m already thinking about it in September.

Make these cookies for your holiday treat exchanges, neighbor gifts, or for Elf movie night – they’re sure to delight all who sample them! But if you don’t think you can wait that long to sink your teeth into this peppermint cookie, go ahead and whip them up right now. I guarantee you’ll be spooked by how fast your meltaway cookies disappear.

Ingredients in Peppermint Cookies
- Butter, softened – I always, always use salted butter. If you don’t have any on hand, you can use unsalted and add an extra pinch of salt to the dough!
- Powdered sugar – The powdered sugar and cake flour is why this is called a meltaway cookie; they literally just melt in your mouth!
- Egg
- Peppermint bakery emulsion – I love the peppermint bakery emulsion from Lorann Oils, but peppermint extract could be used, too.
- Cake flour – Cake flour will make the cookies so soft and fluffy. But you can sub homemade cake flour if needed.
- Baking powder
- Salt
Vanilla Glaze with Peppermint Bits
- Butter – Again, salted.
- Vegetable shortening – This is optional, but it will help the icing to crust and get hard on the outside.
- Powdered sugar
- Milk – Quantity as needed.
- Clear vanilla extract
- red food coloring
- Bob’s sweet stripes soft peppermints, crushed, for garnish – Please for the love of not cracking your teeth, use the bob’s sweet stripes peppermints.

How to Make Meltaway Cookies
- Preheat the oven to 350° F. Line a cookie sheet with parchment paper and set aside.
- In the bowl of a stand mixer or with an electric hand mixer, combine the butter, powdered sugar and egg until smooth and creamy.
- Add the peppermint baking emulsion, mixing until evenly distributed.
- Add the cake flour, baking powder and salt. Mix until a sticky dough forms. Allow the dough to rest for 5 or so minutes- it will be easier to handle that way.
- Portion out the dough into small, 1/2 tbsp portions. Roll into a ball and arrange on the cookie sheet.
- Repeat with remaining dough.
- Bake at 350° F for 7-9 minutes, or until the cookies have spread slightly and look dry on the top.
- While the cookies are baking, make the icing by combining the butter and vegetable shortening until smooth.
- Add the powdered sugar and milk to bring the mixture together into a thick frosting.
- Continue mixing while adding the vanilla extract and enough milk to thin out the icing just a bit.
- Add just the tiniest bit of red food coloring to the icing and stir to combine.
- Microwave the icing to thin it further for about 10 seconds and as soon as the cookies come out of the oven, dip, spread or brush the icing onto the cookie and garnish immediately with the crushed peppermint candies.
- Allow the cookies to cool and enjoy!
Do I need to chill the dough for peppermint meltaway cookies?
Nope! While the dough is extremely sticky, it doesn’t need to be chilled. Just let the dough rest for 5 or so minutes so it’s easier to handle.
How should I store my meltaway cookies?
Once cooled, store your cookies in an airtight container on the counter for 3 days! These cookies also freeze really well and can be stored in a resealable freezer bag for up to 3 months.

Recipes Similar to Peppermint Meltaways
Peppermint Meltaways
Ingredients
- 1 cup (222g) salted butter, softened
- 1 1/4 cup (137g) powdered sugar
- 1 egg
- 1 tsp peppermint bakery emulsion *can use peppermint extract here instead
- 2 1/2 cups (295g) cake flour
- 1 tsp baking powder
- 1/2 tsp salt
Vanilla Glaze with Peppermint Bits
- 2 tbsp butter
- 1/2 tbsp vegetable shortening *This is optional, but it helps the icing to crust and get hard on the outside).
- 3/4 cup (80g) powdered sugar
- 1/8 cup (30ml) milk more, if needed
- 1/2 tsp clear vanilla extract
- red food coloring
- 1/4 cup (42g) bob's sweet stripes soft peppermints crushed for garnish

Instructions
- Preheat the oven to 350° F (180° C). Line a cookie sheet with parchment paper and set aside.
- In the bowl of a stand mixer or with an electric hand mixer, combine the butter, powdered sugar and egg until smooth and creamy.1 cup (222g) salted butter, softened , 1 1/4 cup (137g) powdered sugar , 1 egg
- Add the peppermint baking emulsion, mixing until evenly distributed.1 tsp peppermint bakery emulsion
- Add the cake flour, baking powder and salt. Mix until a sticky dough forms. Allow the dough to rest for 5 or so minutes- it will be easier to handle that way.2 1/2 cups (295g) cake flour, 1 tsp baking powder, 1/2 tsp salt
- Portion out the dough into small, 1/2 tbsp portions. Roll into a ball and arrange on the cookie sheet.
- Repeat with remaining dough.
- Bake at 350° F (180° C) for 7-9 minutes, or until the cookies have spread slightly and look dry on the top.
- While the cookies are baking, make the icing by combining the butter and vegetable shortening until smooth.2 tbsp butter , 1/2 tbsp vegetable shortening
- Add the powdered sugar and milk to bring the mixture together into a thick frosting.3/4 cup (80g) powdered sugar, 1/8 cup (30ml) milk
- Continue mixing while adding the vanilla extract and enough milk to thin out the icing. Use a toothpick to addd the tiniest amount of red food coloring to the icing. Stir and repeat as necessary until you have your desired color.1/2 tsp clear vanilla extract , red food coloring
- Microwave the icing for about 10 seconds to thin and warm it, and as soon as the cookies come out of the oven, dip, spread or brush the icing onto the cookie and garnish immediately with the crushed peppermint candies.1/4 cup (42g) bob's sweet stripes soft peppermints crushed
- Allow the cookies to cool and enjoy!

I can’t wait to make this, but I’m assuming there’s no reason why if you wanted larger cookies you could do so it would just change the baking time am I right and thank you. They look adorable.!
Yes, you can make these larger! Just increase the bake time by a minute or two!
Do you think it would it be possible to do these as a bar like your lemon melt away bars? Has anyone tried that conversion?
Yes, you totally could! The measurements stay the same. 9×13 pan, 350°F 11-15 min.
Truly the perfect Christmas cookie! Melt in your mouth deliciousness! Looks very festive on a platter along with wrapped mini candy canes.
Would it be possible to make the dough a few days ahead of time and keep in the fridge until ready to bake?
I would actually recommend freezing the dough in balls until you are ready to bake! Then let them thaw while the oven is preheating and bake as normal.