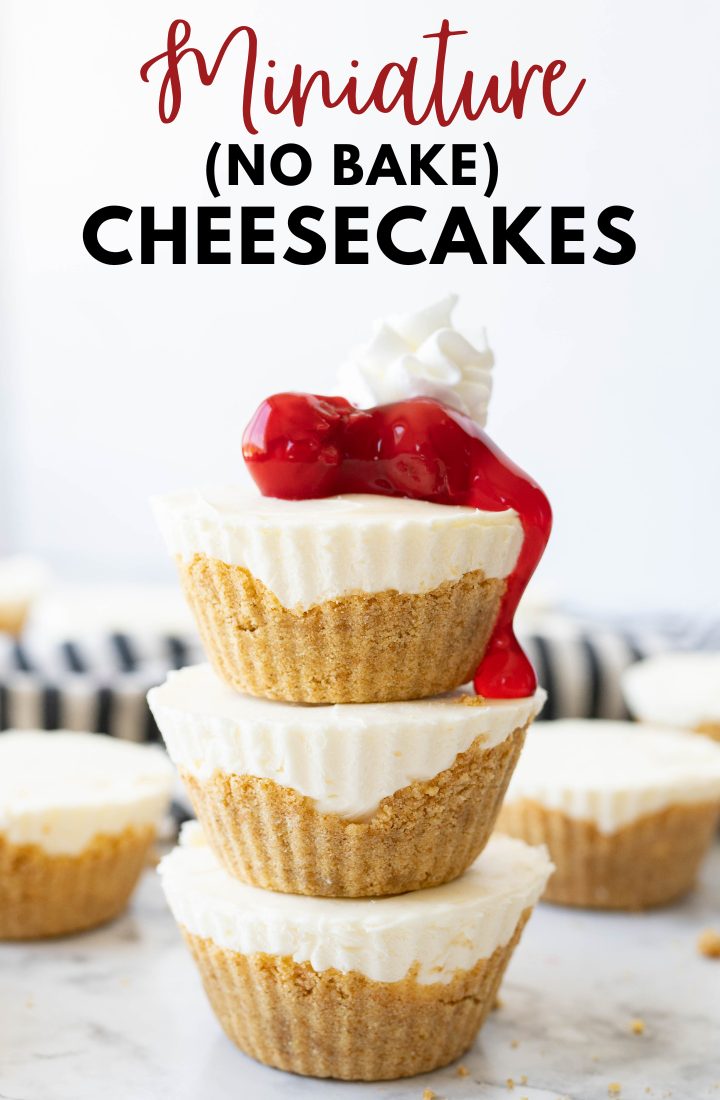
Mini Cheesecake Recipe (No Bake!)
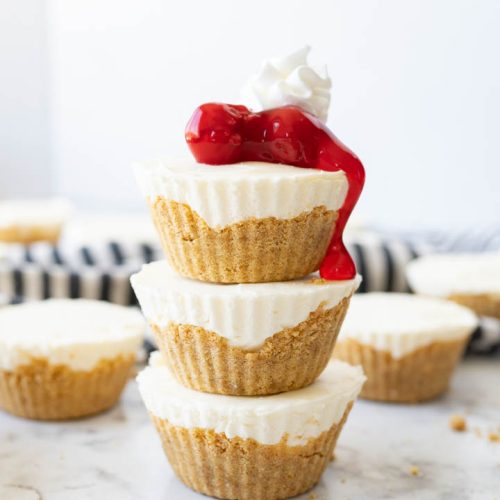
These mini no-bake cheesecakes are every bit as decadent as the real deal, but much easier to make! Mini cheesecakes set up in the refrigerator instead of the oven but turn out just as creamy and sweet.
Jump to Recipe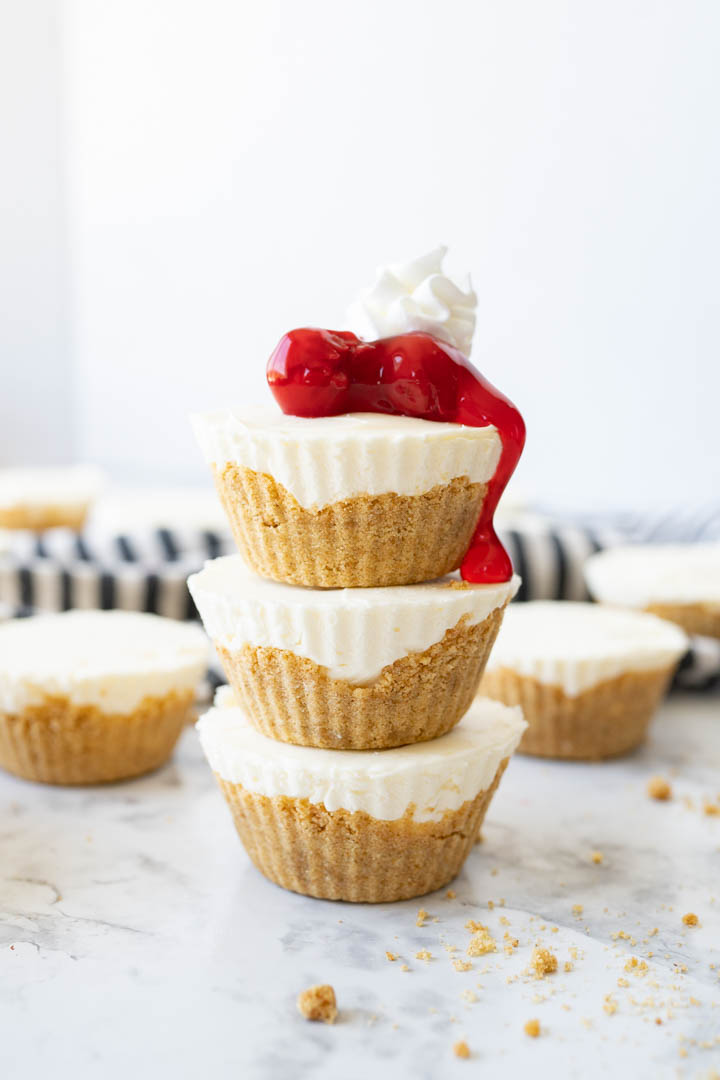
Mini Cheesecakes Recipe
Let’s dive in – what even are mini no-bake cheesecakes? They’re exactly what the name implies: cheesecake made without the oven! My recipe for mini cheesecake takes a traditionally complicated recipe and makes it super simple. Uber easy and endlessly delicious, no-bake cheesecake has a light and airy texture your bougie taste buds will adore.

While I also have a full-size version of no-bake cheesecake in my arsenal, I love to make individual cheesecake cups! Perfect for portion control and parties, receptions, showers – you name it, you can easily whip up mini cheesecakes and offer a myriad of toppings for guests to customize as they please. Delicious and easy to serve to a crowd? It’s a win-win in my book.
You’ll adore this Mini Cheesecake Recipe (No Bake!)
This mini cheesecake recipe is uber easy and endlessly delicious. With the ability to customize toppings to your liking, no-bake cheesecake cups were made for serving at parties, receptions, showers – you name it! Not to mention, they are really freaking cute! (Why is a tiny dessert always so cute?!) Anyway, if you’re in the middle of creating your dream menu for any soiree, or just Tuesday night, don’t miss out on these heavenly mini cheesecakes.
Mini Cheesecake Ingredients
Cheesecake:
- Whipping cream – You can also use 4 cups of cool whip in place of the whipped cream, if desired.
- Sugar
- Cream cheese (room temperature) – Use the block of cream cheese, not the spreadable tub kind. To avoid lumpy cheesecakes, make sure the cream cheese is room temperature and not straight from the fridge.
- Cheesecake (or vanilla) flavored pudding mix – Use just the powder (don’t mix up the pudding first – that would be a disaster!) and make sure you select a packet that IS NOT sugar free. If you cannot find Cheesecake flavor, use vanilla instead.
Crust:
- Graham crackers – You can customize the crust as you please! Try subbing Oreoes or Biscoff cookies for a next-level treat!
- Butter, melted – I use salted butter in the crust.
- Brown sugar

How to make Mini Cheesecakes
- Line 24 cupcake tins with liners. I like to use silicone liners for ease and reusability. Set aside.
- Using a food processor, blender, or in a gallon sized zip top bag with a rolling pin, crush the graham crackers until in a powder.
- Add the brown sugar and melted butter, mixing until the texture is like wet sand.
- Scoop 1 1/2 tbsp of the crust into each prepared cupcake liner. Use the back of a spoon to press the mixture firmly to the bottom and halfway up the sides of the cupcake liner.
- Place the cupcake tins in the freezer until needed.
- In the bowl of a stand mixer, add the whipping cream and sugar. Whip on high speed until thick and stiff peaks form.
- Transfer the whipped cream into a separate bowl.
- Using the whisk attachment, cream the room temperature cream cheese until smooth.
- Slowly add in the cheesecake pudding mix (just the powder) to the cream cheese, mixing until everything is incorporated and smooth.
- Slowly add the whipped cream to the cream cheese mixture, mixing until completely combined and smooth.
- Add 3 tbsp of cheesecake batter to each of the cupcake tins filled with the crust.
- Use an offset spatula to smooth the tops of the cheesecakes.
- Repeat until all of the cheesecakes are filled.
- Freeze for 1 hour and then remove the cupcake liners from the mini cheesecakes.
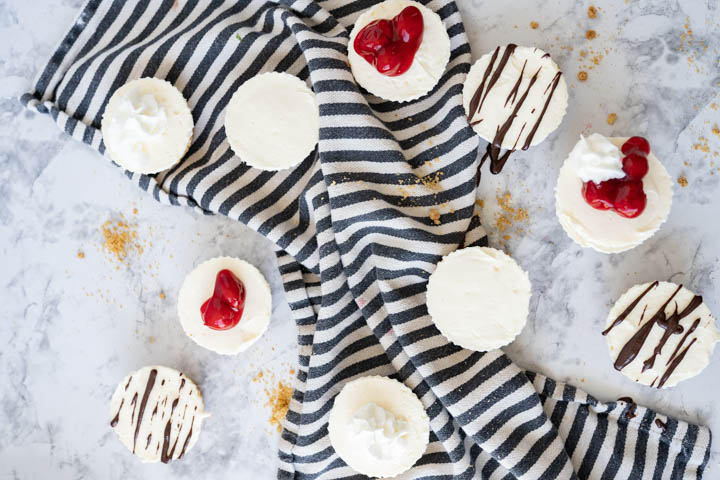
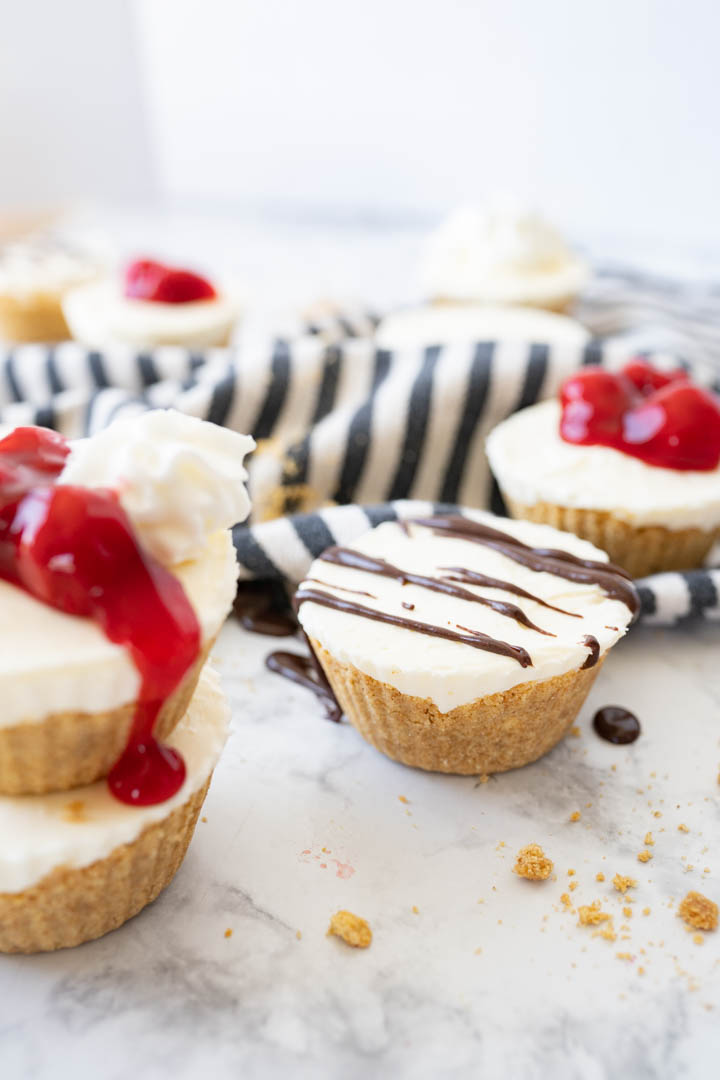
- Top with your favorite cheesecake topping and enjoy!
- Store in the fridge for up to 1 week or in the freezer for up to 3 months.
Mini Cheesecake Recipe Serving Suggestions
Fruit is always my number 1 go-to for toppings! Serve it fresh, in a syrup, or use canned pie filling & you’re sure to knock it out of the park.
Outside of fruit, I also love crushed oreos, chocolate syrup, caramel and whipped cream! You really cannot go wrong.
If you’re really looking to enhance these cheesecakes, you can also play around with the crust and use oreos or biscoff cookies instead of graham crackers.
How to Store Mini No Bake Cheesecake
Store in an airtight container in the fridge for up to 1 week.
Freezing Mini No Bake Cheesecake
You can also freeze these in a resealable freezer bag (separated by layers of parchment paper) for up to 3 months.
Other Delicious Desserts
Mini No Bake Cheesecake
Ingredients
Cheesecakes
- 1 pint whipping cream
- 3/4 cup sugar
- 24 oz cream cheese, room temperature
- 1 package (3.4 oz) cheesecake (or vanilla) flavored pudding mix
Crust
- 16 graham crackers
- 1/2 cup butter, melted
- 1/3 cup brown sugar

Instructions
- Line 24 cupcake tins with liners- I like to use silicone liners to for ease and reusability. Set aside.
- Using a food processor, blender or in a gallon sized zip top bag with a rolling pin, crush the graham crackers until in a powder.
- Add the brown sugar and melted butter, mixing until the texture is like wet sand.
- Scoop 1 1/2 tbsp of the crust into each prepared cupcake liner. Use the back of a spoon to press the mixture firmly to the bottom and halfway up the sides of the cupcake liner. Place the cupcake tins in the freezer until needed.
- In the bowl of a stand mixer, add the whipping cream and sugar. Whip on high speed until thick and stiff peaks form.Transfer the whipped cream into a separate bowl.
- Using the whisk attachment, cream the room temperature cream cheese until smooth.
- Slowly add in the cheesecake pudding mix (just the powder) to the cream cheese, mixing until everything is incorporated and smooth.
- Slowly add the whipped cream to the cream cheese mixture, mixing until completely combined and smooth.
- Add 3 tbsp of cheesecake batter to each of the cupcake tins filled with the crust.
- Use an offset spatula to smooth the tops of the cheesecakes.
- Repeat until all of the cheesecakes are filled.
- Freeze for 1 hour and then remove the cupcake liners from the mini cheesecakes.Top with your favorite cheesecake topping and enjoy!
- Store in the fridge for up to 1 week or in the freezer for up to 3 months.

I added 1tsp vanilla to the whipping cream.
Used Swerve brown and granulated sugars.
Used Junket Danis desserts glaze for topping
And used regular cheesecake instant pudding.
OMG! I thought it was going to taste bland because of the no sugar, but the regular pudding mix gave it the perfect amount of sugar to fulfill your sugar cravings.
This dessert was inspired for a friend who has diabetes. I wanted to see if I cut out at least 3/4 of the amount of sugar if it would taste great. And I succeeded. It’s perfect and delicious! Thank you Karrie
Yvette Perez Stevenson
Minnesota Cottage Baker
I made these yesterday and they were so easy and delicious! My little ones even loved them! Thank you for this amazing recipe!
I have never made no bake cheesecake, it was easy and delicious. Only change I made was I made gingersnap cookies, put them in the food processor and used them for the crust.
Good morning g. Would these work in mini muffin pans? Thank you.
Yes, they would! I recommend using silicone liners or pans to make it easier to get the cheesecakes out.
Can I leave them in the liners to serve?
Yes, absolutely!