Colorful Collage Cookies
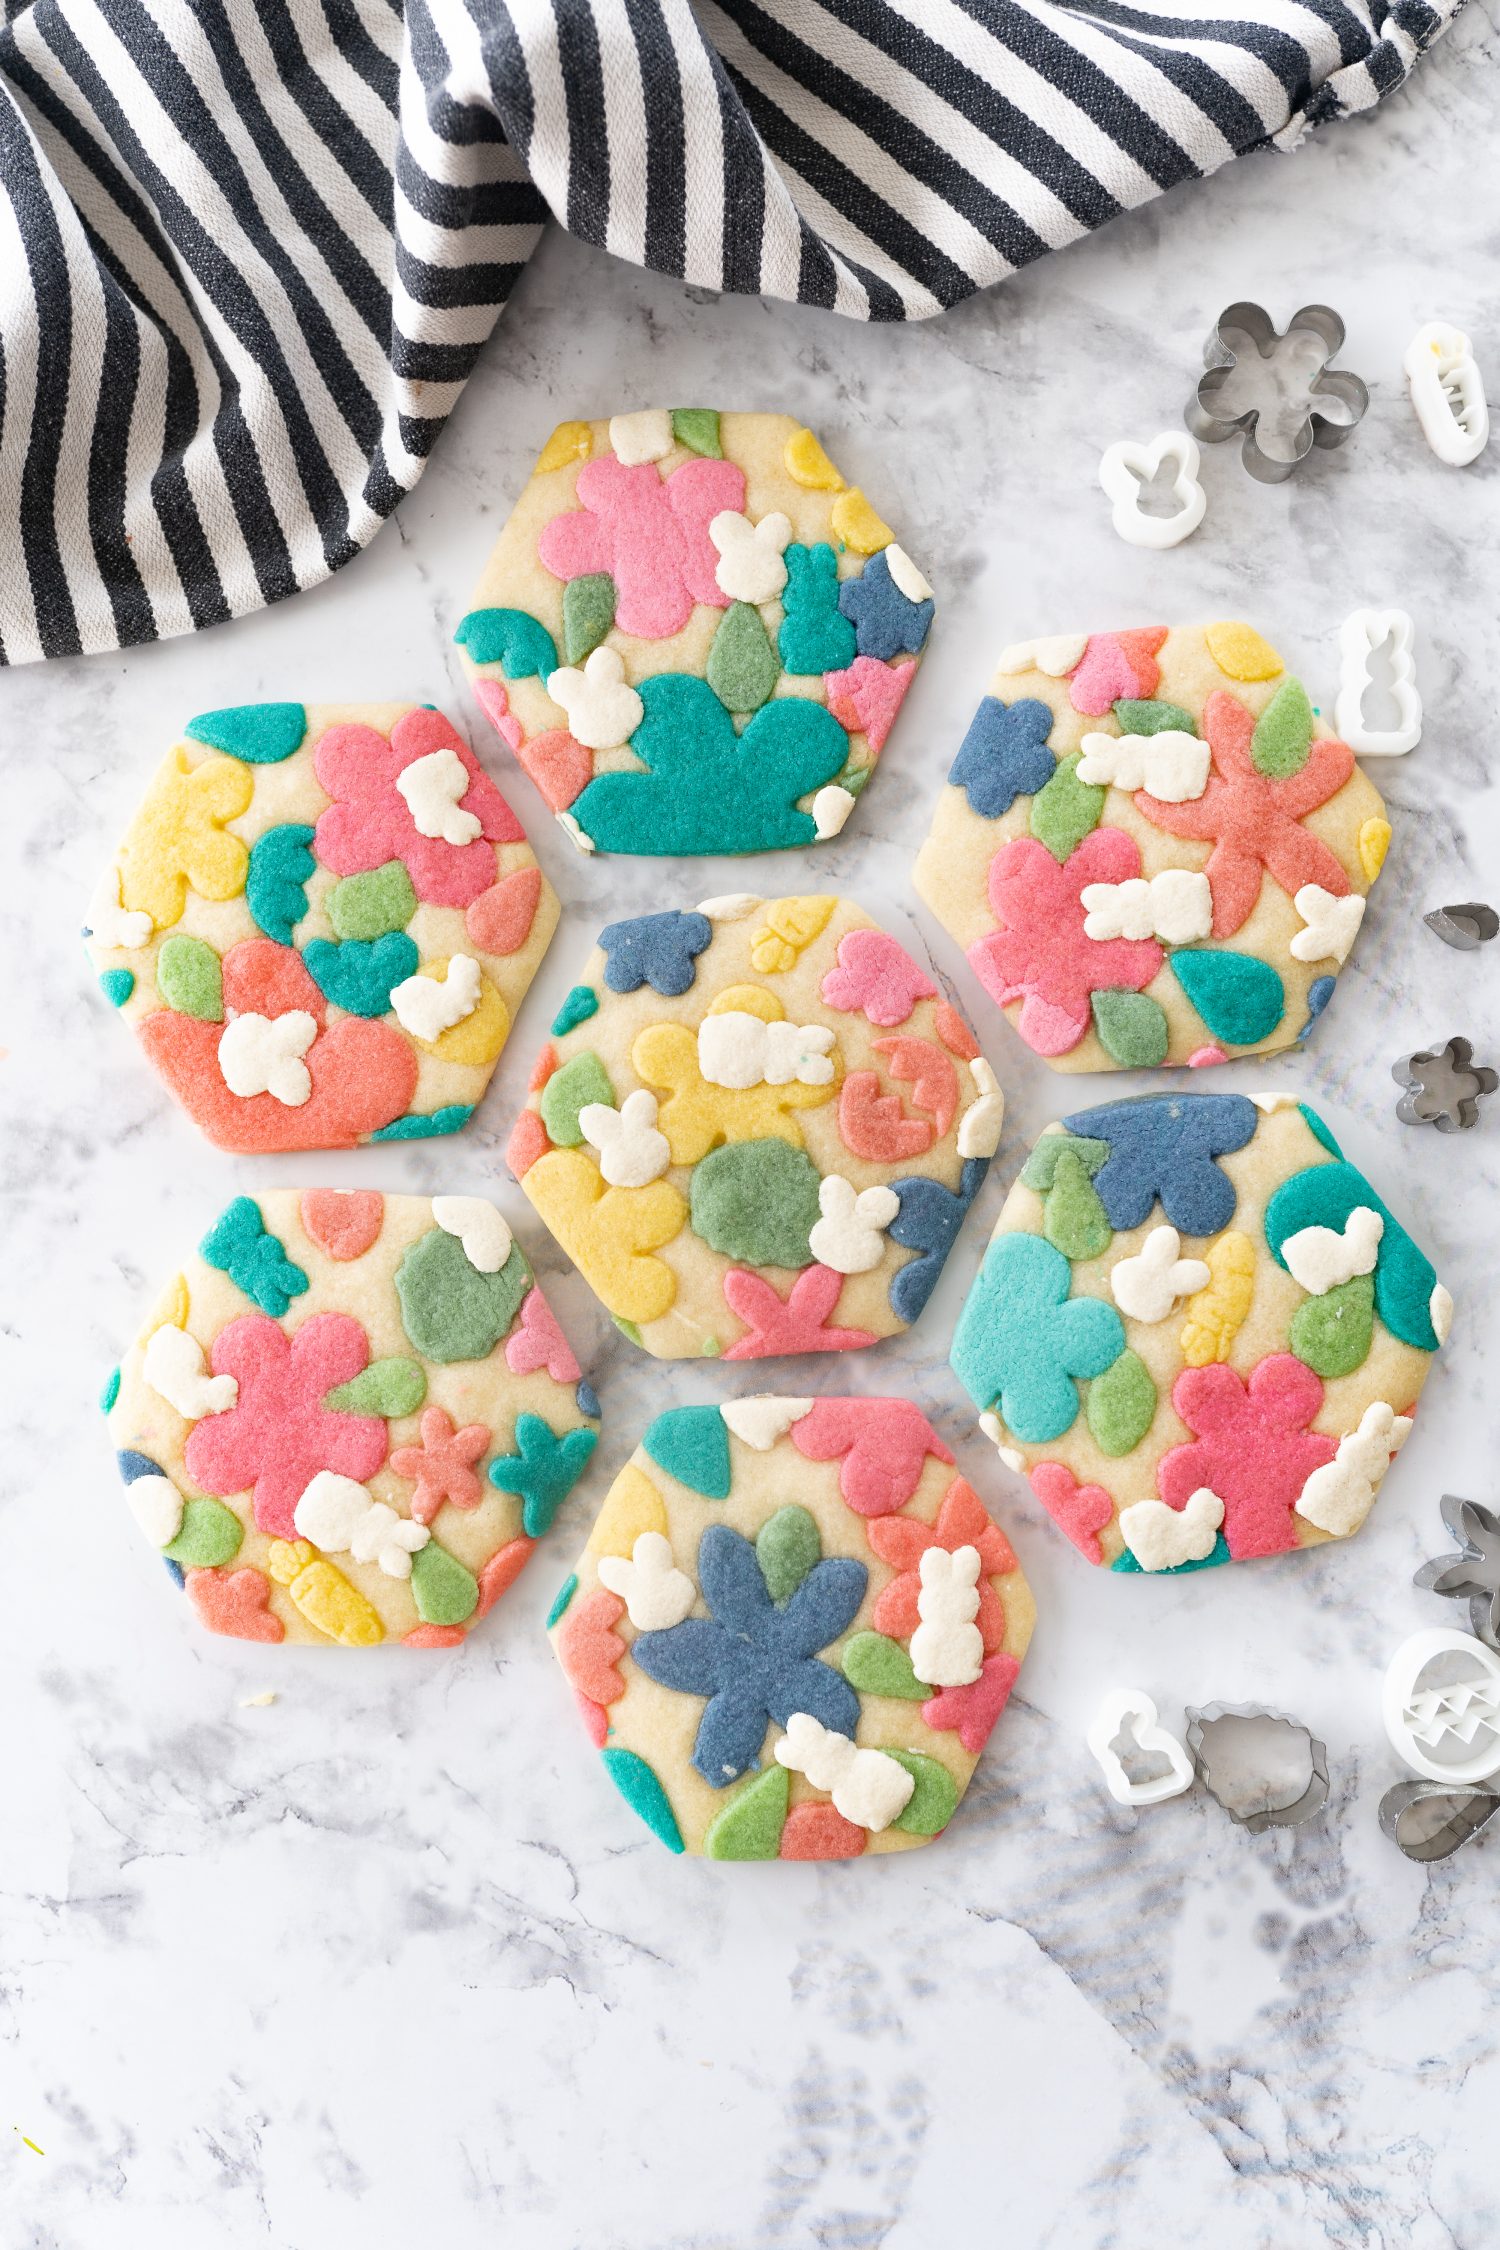
Collage Sugar Cookies are a soft and chewy Sugar cookie topped with small pressed cut out sugar cookies into the dough, creating a collage effect. These are so cute and festive- perfect for any occasion!
Jump to Recipe
Floral Collage Cookie Recipe
I came across a video on TikTok a few weeks ago where someone made a floral collage using just sugar cookie dough and just about DIED.

I knew, right then and there, I NEEDED to give it a try. I am SO glad that I did. While, I will admit, it was much more time intensive that I was anticipating, it all paid off. These little cookies were darn near the cutest thing I had ever made.
Let’s learn how you can make them, too!
Ingredients needed for Collage Sugar Cookies
- Salted Butter (softened) – I always use salted butter for my cookies- if you only have unsalted butter, add a pinch of salt to your cookie dough at the same time you add the flour and baking powder.
- Granulated Sugar– just granulated sugar here, since we are making a sugar cookie dough.
- Egg + Egg White
- Vanilla Extract – You can substitute other flavorings like lemon bakery emulsion or almond extract, if you prefer. However, almond extract is notoriously stronger so if you use that, I would suggest using only 1 tsp at most.
- All Purpose Flour– no fancy flour needed for this recipe!
- Baking Powder– This will help our sugar cookies puff up and have jut the tiniest amount of lift. Don’t worry, though, the cookies will still be soft and chewy.
- White Gel Food Coloring – I always use gel food coloring because it doesn’t add additional liquid to the dough. This is my go-to brand for white food coloring.
- Colorful Gel Food Coloring – Use whatever other colors you prefer for a fun design! I love this pack because it comes with all the colors you could need.
Equipment
- Stand Mixer – I use a Kitchen Aid but you can use a Bosch. I recommend a stand mixer because this is a large batch of cookie dough and we really need to get everything kneaded and worked together for this recipe to be successful.
- Small Cookie Cutters – I actually used Easter clay cutters for the photos you see in this recipe. However, feel free to use any cookie cutters you want. It’s totally not necessary to buy new cookie cutters just for this recipe. You can just use parts of other cookie cutters that you already have to make flour petals and then place everything together as if it were a painting. When you roll the cookie dough flatter, it will be a pretty flowery abstract cookie. But, if you’re looking for an excuse for some cute new mini cookie cutters, these tiny flower cookie cutters are some of my favorites.
- Food Grade Gloves – These are for keeping your hands clean while kneading the color into the cookie dough- you can also use your mixer to mix in the food coloring, If you don’t have food grade gloves.
- Parchment Paper– we will put this down on top of the cookie dough before we roll it to press the colored cut outs into the plain cookie dough.
- Rolling Pin
- Larger Cookie Cutter– this can be any shape, I used a hexagon cookie cutter for the photos in this post. You can also use a smaller circle or something similar and then make sandwich cookies with frosting in between.
- Cookie Sheet
How to Make Fun, Colorful Cookies
Making the Cookie Dough
- Cream together the butter and sugar in the bowl of a stand mixer for 2 minutes. The mixture will be light in color and fluffy in texture.
- Mix in the eggs and vanilla extract– you can use alternate flavoring here, if you’d like!
- Add in the dry ingredients– flour and baking powder. Mix until a dough forms. This may take a minute in your mixer, just keep mixing until the dough comes together.
- Knead the dough on your counter for 30 seconds or so, it should feel like play-dough. If it has a hard time sticking together, return to the mixer and add in 1-2 tsp of water.
Dividing and Dying the cookie dough
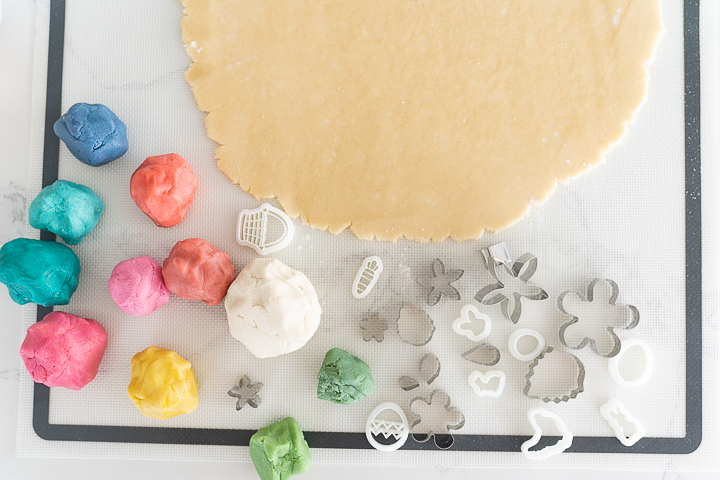
- Divide the cookie dough in half. Wrap one half with plastic wrap and set aside. This will be the base cookie dough that you will add the designs on top of. We won’t roll it out now, because it will dry out by the time we have the small cut out pieces ready.
- Divide the other half into smaller portions to dye your desired color. (the amount will depend on how many colors you’d like to use). Use gloves and plastic wrap on your counter to knead the food coloring into each portion of cookie dough. Alternatively, you can return the small amount of dough with the food coloring to your mixer- sometimes the mixer has a hard time if it is too small of a portion together.
- To make slight variations on each color, try combining a small amount of two colors together to achieve a new color. I like to have a darker and lighter version of the same color so I will take half of a color and then add a little bit of white cookie dough and knead it together to achieve a lighter version of that color.
- Repeat until all of your cookie dough is colored. If you are not working with the cookie dough, cover it with plastic wrap to keep it from drying out.
Rolling and Cutting the Cookie Dough
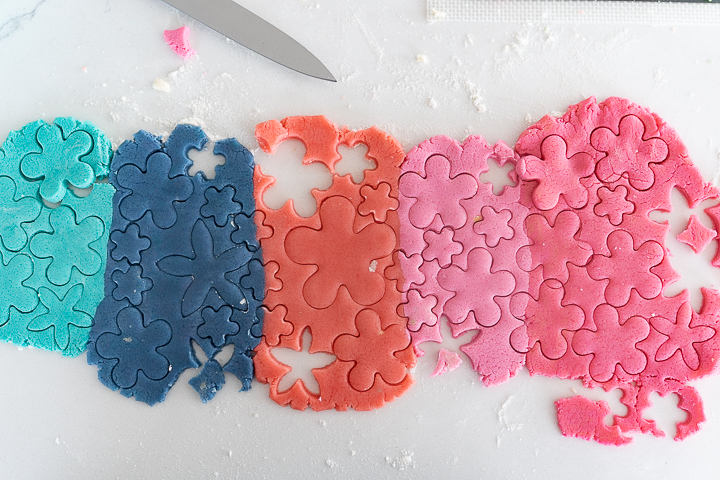
- Roll the colored cookie dough out until pretty thin (approx 1/8 inch) and then use the small cookie cutters to cut out your desired shapes. Set aside.
- Repeat with remaining colors.
- Once all of your colored cookie dough is cut out, preheat your oven to 350° F.
- Unwrap your half of plain cookie dough and roll out on a lightly floured surface until about 1/2 inch thick.
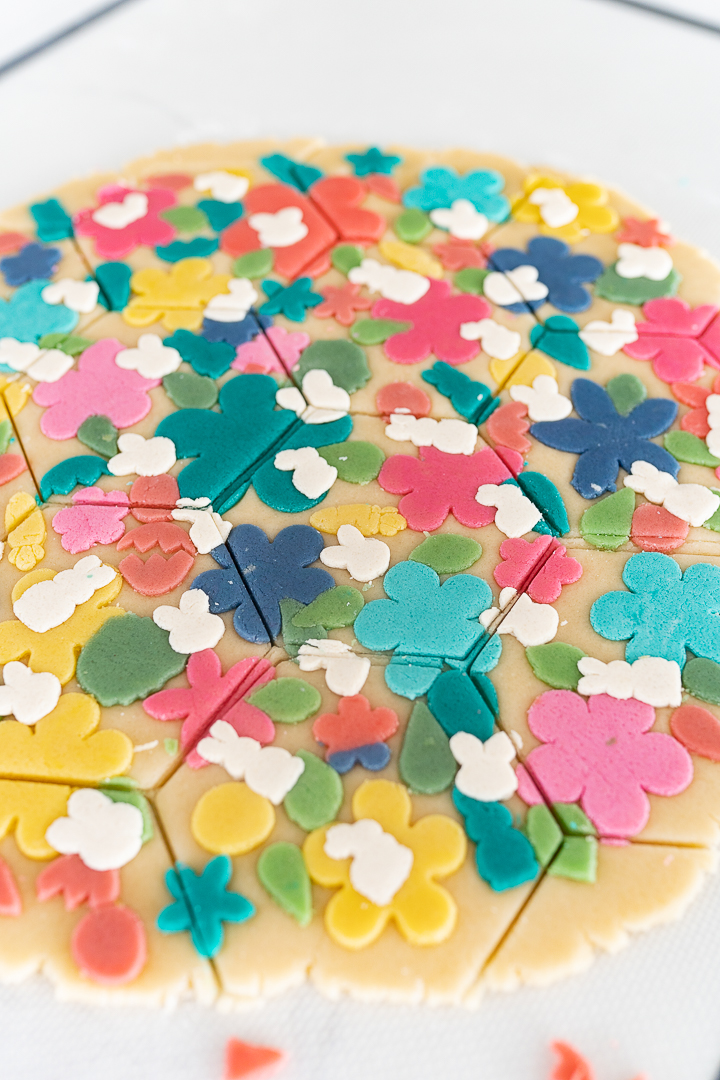
- Arrange your cut out pieces of colored dough onto the rolled out cookie dough how you would like it. You can overlap pieces, as you wish.
- Place a large sheet of parchment paper over the cookie dough. Next we will press the cookie dough down– you can do this by either gently using a rolling pin or pressing a cookie sheet down on top of the cookie dough. The cut outs will distort a little bit more if using a rolling pin.
- Remove the parchment paper once the cookie dough is a little less than 1/2 inch thick.
- Use a larger cookie cutter to cut your final cookie shape. I like to use a hexagon or square that way I don’t have any leftover cookie dough pieces.
Baking the cookies
- Arrange on a parchment lined cookie sheet. The cookies will not spread, just puff a little bit, so you can place them fairly close together.
- Bake at 350° F for 7-9 minutes, or until the centers of the cookies puff up and are no longer wet and glossy. The exact timing will depend on how large the finished cookie is.
- Remove from the oven and allow to cool on the pan.
- Store in an airtight container.
- You can make sandwich cookies out of these if you like your cookies with frosting!
What if the colored dough shapes aren’t sticking to the other dough?
Even if the colored cookies on top don’t really stick to the dough before baking, during the baking process they will stick.
Can I frost Collage Sugar Cookies?
If you like your sugar cookies frosted, I suggest either serving these with a little side of frosting to dip in or making sandwich cookies out of them.
How to store leftover sugar cookies
You’ll want to store the cookies in an air tight container. I actually prefer these cookies on day 2 rather than day 1. The cookies really soften up after a day sitting in an air tight container.
You can also make these ahead of time and freeze them. I suggest freezing the finished, baked cookie, rather than freezing the cookie dough.
Recipes Similar to Floral Collage Cookies

Collage Sugar Cookies
Equipment
- Stand mixer
- food grade gloves for kneading the coloring into the dough
- parchment paper
- Rolling Pin
- larger cookie cutter
Ingredients
- 1 1/2 cups salted butter softened
- 1 1/2 cups granulated sugar
- 1 egg
- 1 egg white
- 3 tsp vanilla extract
- 4 1/2 cups all purpose flour
- 3 tsp baking powder
- gel food coloring

Instructions
Sugar Cookie Dough
- In the bowl of a stand mixer, cream together your butter and sugar for 2 minutes.
- Scrape the sides of the bowl, add in the eggs and vanilla extract. Mix until well combined.
- Scrape the sides of the bowl, add in the flour and baking powder.
- Mix until your dough forms. This may take a minute in your mixer, just keep mixing until the dough comes together.
- Knead the dough on your counter for 30 seconds or so, it should feel like play-dough. If it has a hard time sticking together, return to the mixer and add in 1-2 tsp of water.
- Divide the cookie dough in half. Wrap one half with plastic wrap and set aside.
- Divide the other half into smaller portions (the amount will depend on how many colors you’d like to use).
Dying the cookie dough
- Use gloves and plastic wrap on your counter to knead the food coloring into each portion of cookie dough.
- To make slight variations on each color, try combining a small amount of two colors together to achieve a new color. I like to have a darker and lighter version of the same color so I will take half of a color and then add a little bit of white cookie dough and knead it together to achieve a lighter version of that color.
- Repeat until all of your cookie dough is colored. If you are not working with the cookie dough, cover it with plastic wrap to keep it from drying out.
Rolling and cutting the cookie dough
- Roll the colored cookie dough out until pretty thin (approx 1/8 inch) and then use the small cookie cutters to cut out your desired shapes. Set aside.
- Repeat with remaining colors.
- Once all of your colored cookie dough is cut out, preheat your oven to 350° F.
- Unwrap your half of plain cookie dough and roll out on a lightly floured surface until about 1/2 inch thick.
- Arrange your cut out pieces of colored dough onto the rolled out cookie dough how you would like it. You can overlap pieces, as you wish.
- Place a large sheet of parchment paper over the cookie dough. Next we will press the cookie dough down- you can do this by either gently using a rolling pin or pressing a cookie sheet down on top of the cookie dough.
- The cut outs will distort a little bit more if using a rolling pin.
- Remove the parchment paper once the cookie dough is a little less than 1/2 inch thick.
- Use a larger cookie cutter to cut your final cookie shape.
- Arrange on a parchment lined cookie sheet.
Baking the cookies
- Bake at 350° F for 7-9 minutes, or until the centers of the cookies puff up and are no longer wet and glossy.
- Remove from the oven and allow to cool on the pan.
- Store in an airtight container.
- You can make sandwich cookies out of these if you like your cookies with frosting!

This are awesome and so pretty! Thank you for sharing! Another Karli cookie recipe I’m adding to my list to make!
Thank you for your wonderful recipes. Just so you’re aware, this recipe has baking powder listed in the ingredients, but baking soda listed in the directions.